- For other uses, see Death (disambiguation).


- "Then, for the Master, I'll feast on your soul this night!"
- — Death, before fighting Alucard in Symphony of the Night
Death (死神 Shinigami?), also known as the Grim Reaper, is a major villain from Konami's Castlevania series. He is a being born out of Chaos, which in turn came about from the evil in the hearts of humans.[3] Death is Count Dracula's second-in-command, thus he usually appears near the end of the protagonist's quest —often in the Clock Tower— to challenge them before they confront the Count. He is also sometimes the first of Dracula's major servants to greet the protagonist, such as in Castlevania: Rondo of Blood, Castlevania: Symphony of the Night and Akumajō Dracula: The Arcade. He has appeared in every game except Castlevania: The Adventure and Castlevania II: Belmont's Revenge.
Death sometimes plays an equal or lesser role in Dracula's organization when someone other than he is the driving force behind Dracula's resurrection, such as Shaft, Elizabeth Bartley or Carmilla. Two of Death's closest associates include Slogra and Gaibon, who directly report to him. He has also been known to show respect to characters for their courage and skill.
Death can also use dark arts to summon the souls of the dead and defeat even the strongest of the living. Being an evil-aligned creature of chaos, Death is very resilient to dark-based attacks, but yields to weapons containing holy properties such as the Vampire Killer.
History
Events of Castlevania: Lament of Innocence
- "Unfortunately for you, as long as my master survives, I will rise from the dead..."
- — Death to Leon
This mysterious being forges an alliance with Mathias Cronqvist —who later becomes known as Dracula— in 1094. Initially, Death pretended to be a servant to Walter Bernhard, owner of the Ebony Stone. However, he later betrayed Walter after Leon Belmont defeated him with the newly forged Vampire Killer.
It is revealed that Mathias had the Crimson Stone, a stone much more powerful than the Ebony Stone. With Walter defeated, Mathias gained access to Walter's Ebony Stone, giving him both of the vampire's treasures. To add insult to injury, Mathias used the Crimson Stone to suck out Walter's soul and place it inside the stone. The soul became a power source to fuel Mathias's dark desires.
Crushed by Mathias's turn to the dark forces of evil, Leon was ready to slay his former friend when Death arrived and challenged him in the final showdown of the game. Even though Death was defeated, Mathias made his escape after some parting words with Leon. With Mathias gone, Leon swore that no matter where he should go, the Belmont Clan would hunt him and his kind down forever.
Since then, Death has proven to be the Count's most loyal and devoted servant.
Events of Castlevania III: Dracula's Curse
In 1476, Death returned alongside Dracula to terrorize the Transylvanian countryside. He was eventually encountered and defeated by Trevor Belmont, Sypha Belnades, Grant Danasty, and the then-recently defected Alucard at the Castle Entrance. However, this would not be the last of him.
Events of Castlevania: Curse of Darkness
- For more information, see Zead and Castlevania: Curse of Darkness.
- "Soon, my master will enter Isaac's body. Though you were favored, Isaac will do. Dracula will once more walk the night! And as of you, it is time for you to die!"
- — Zead as Death, to Hector
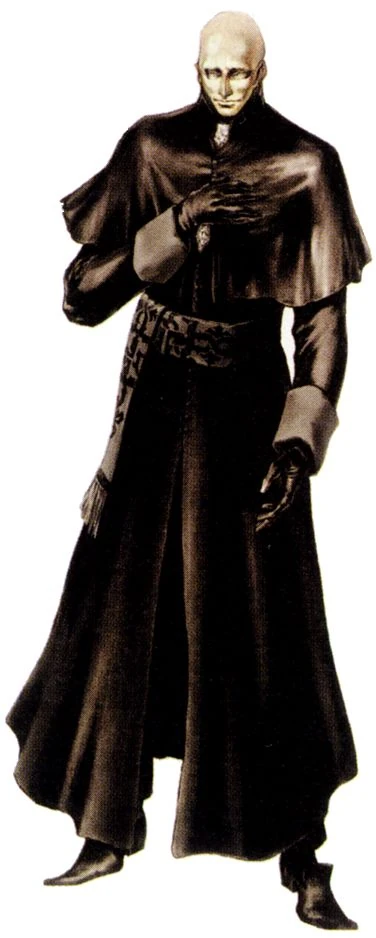
After Trevor Belmont had successfully defeated Dracula, the Count placed a curse on all of Europe, with the intent that the corruption and misery bred from it would bring about his resurrection. To speed up the process, a mysterious priest by the name of Zead came across Hector, and appeared friendly enough with his wanting to help him defeat his nemesis, Isaac. What Hector didn't know was that the priest was actually Death in disguise. However, his disguise did not fool the time-traveling Saint Germain, who knew that if either Devil Forgemaster, Hector or Isaac, should fall, then the Dark Lord could be revived. Both fight, and in spite of Saint Germain getting the upper hand during their first tussle (and mentioning he would return until Zead surrendered), Zead manages to trick him into the Eneomaos Machine Tower and freezes his powers until he is defeated in combat by Hector. After this, Saint Germain leaves the timeline, after asking Hector to give Zead his sarcastic regards.
In the reborn castle of Dracula, Hector fights and kills Isaac, but does not fall prey to the curse. Before he knows it, the body of Isaac is whisked away into a coffin by Zead. He had originally planned on using Hector as the host for Dracula when he succumbed to the curse, but because Hector rejected the curse at the last moment, he is forced to settle with Isaac's corpse. When Zead removes a scythe from his sleeve, it is then that Hector realizes who Zead really is. Shedding his disguise, Death battles Hector, only to be defeated by the Forgemaster, expressing disbelief that he was defeated by a human.
Events of Castlevania
In 1691, Death returned alongside Dracula to Transylvania. Trevor's descendant, Simon Belmont, encountered him inside the dungeon of the castle and ultimately defeated him.
Events of Castlevania II: Simon's Quest
After Simon had successfully defeated Dracula, the Count placed a curse on him, forcing the latter to find several relics of the deceased Count and destroy them in order to end the curse on both him and Transylvania as a whole. Death was charged with guarding the Eye of Vlad at the Brahm Mansion, although he was ultimately defeated by Simon.
Events of Castlevania: Harmony of Dissonance
- Main article: Death/Harmony of Dissonance
- "Do not interfere. Now, I will extinguish the candle of your soul!"
- — Death to Juste
This time around, Death wanders through "Dracula's Castle" searching for his Lord while trying to understand where his master has disappeared to. He met with Juste inside the Marble Corridor, and implies that, while the castle might technically be Dracula's castle, the actual master of it was not Dracula himself before taking his leave. Death soon realizes thanks to Juste that due to Maxim Kischine's eagerness to find and destroy Dracula's body parts the same way Simon Belmont did about half a century ago, he inadvertently had awoken the spirit of Dracula.
This led to Maxim slowly being taken over by the spirit of the Dark Lord, and the split of Dracula's Castle into two different castles. Death recognizes that Maxim's body would make a suitable host for the resurrection of Dracula, and soon seeks to prevent Juste Belmont from finding his friend and freeing him from Dracula's control. He also tries to locate Lydie, eventually finding her with Juste's unwitting help and takes her, viewing her as a necessary sacrifice to ensure Maxim becomes Dracula, and thus complete the castle. He then fought Juste in an attempt to prevent him from interfering. He ultimately is defeated, although he makes clear that the castle would inevitably merge in the future.
Events of Castlevania: Rondo of Blood
Upon returning alongside Dracula in 1792, Death briefly tested Richter Belmont as the latter attempted to race over to Aljiba as it was under siege by Dracula's forces. After gauging Richter via throwing his scythe and summoning a giant skull and Richter parrying both attacks, he then took his leave, although not before vowing that he won't hold back in their next encounter.
True to his word, Death encountered Richter aboard a ghost ship, and fought him in an intense battle. Ultimately, he was defeated, with his accidentally beheading himself after he threw his scythe in the air from being stunned.
Events of Castlevania: Symphony of the Night
- Main article: Death/Symphony of the Night
After the dark priest Shaft's successful resurrection of Dracula, the Count was swiftly defeated by Richter Belmont in 1792. However, due to a sinister curse placed on him by Shaft, Richter was slowly being possessed by an evil spirit. Five years later, in 1797, Richter Belmont mysteriously disappeared while Dracula's Castle appeared once again.
This time, Dracula's son, Alucard, awakens from his self-inflicted permanent slumber when he senses that something is terribly amiss. When he enters Dracula's Castle, Alucard is confronted by Death. Since Alucard is Dracula's son, Death gives him a chance to cease his attack and turn back. Upon refusing, Death steals all of his equipment and scatters it throughout the entire castle, although not before warning that this will not be their final encounter.
Later, when Alucard encounters Death again, the Grim Reaper notes that he has given ample warning, and with Alucard not backing down, he engages him in combat, suffering defeat at the hands of Dracula's son.
Events of Castlevania: Order of Ecclesia
- Main article: Castlevania: Order of Ecclesia
Even though there are no specific cutscenes with Death in Castlevania: Order of Ecclesia, he does serve as the boss of the Mechanical Tower, in an attempt to kill Shanoa before she absorbs one of three key Glyphs that would allow her passage to Dracula's domain. It should also be noted that if the player is defeated in this fight, Death will say "Your soul has burned itself out", one of the rare instances of a boss actually commenting about a playable character's death, if any.
Events of Castlevania: Bloodlines
In 1917, Death guarded Elizabeth Bartley from both John Morris and Eric Lecarde, presumably in an attempt to allow her to revive Dracula. However, he ultimately fell to them.
Events of Castlevania: Portrait of Ruin
- Main article: Death/Portrait of Ruin
In Castlevania: Portrait of Ruin, Death once again wanders through the castle seeking his Lord and Master, Dracula. However, when he runs into Jonathan Morris and Charlotte Aulin, he learns of the interloper, Brauner, taking the role of Lord of the Castle for himself. Death initially rebuffs the idea of anyone except Dracula controlling the castle, saying the notion is "positively absurd". At first, he does not even try to fight the heroes, even hinting at a possible alliance to kill Brauner, albeit with different aims in mind. However, he is rebuffed and is later confronted in the castle's Clock Tower. He leaves the battle when his energy is exhausted, saying he has other affairs to handle, although not before inferring that he's only sparing the two because they themselves still have a "role" to accomplish, and also making clear this was not to be their final encounter.
Later, after Jonathan and Charlotte defeat Brauner, Death materializes and slices through the usurper with a swing of his Scythe to finish him off. When Jonathan and Charlotte pursue him, they find the newly risen Dracula. Ready to take him out, Jonathan is blocked by Death, who has come to Dracula's aid. In a surprising turn of events, Death and Dracula decide to team up for their battle against the two young heroes. When either Death's or Dracula's life is depleted, Death screams "My power! Use my power!", and at this point, Dracula holds out both hands and calls out "Soul Steal", allowing him to absorb Death's soul and change into True Dracula. It's worth noting that this is likely a callback to Alucard's Soul Steal spell from Symphony of the Night, as well as a reference to Soma's Power of Dominance seen in Aria and Dawn of Sorrow.
Events of Grimoire of Souls
Genya Arikado, or more accurately, Alucard, encountered Death inside the Grimoire of Souls while trying to locate the core monster inside the book that was causing the Grimoire and others to release monsters into the real world. He fought Death, although because Arikado was forced to utilize an avatar to access the book and thus was in a comparably weak state, Death subdued him, and also implied that the book was making Death stronger and was aware that he was inside the Grimoire. This led Arikado to suspect that someone was causing the chaos.
Events of Akumajō Dracula: Kabuchi no Tsuisoukyoku
After the ultimate defeat of Dracula in 1999, Death remained with the castle in the eclipse and fought Soma Cruz there in 2035. He would fight him again the following year in Celia's castle. Death is mysteriously revived once more during 2037, in a part of Wallachia where he encounters Dracula's Castle, but realizing neither his master nor a Dark Lord are present, the event confuses him as he believes his resurrection in these circumstances impossible. He travels to Japan in order to seek Soma, whom he visits after he separates from Mina Hakuba. Initially, Soma is restless but Death assures his intentions are not hostile toward him or Mina. Death asks Soma if he would assume his role as a Dark Lord, but Soma refuses, being comfortable with his current human life. Death then wonders if the current events are really Soma's doing, but Soma does not understand what Death means and demands answers. However, Death replies that since Soma isn't willing to be his master then he has no obligation to answer and departs.
Death returns to the castle where he notices humans in the castle, at the same time realizing the monsters are not hostile towards these humans this confuses Death even further as he looks for his master. He finds Slogra and Gaibon whom he orders to report the current situation. Neither of them respond but strangely attack Death for no reason. Although surprised Death does not the take the insolence kindly and destroys both of them, but he quickly notices that neither of them ever let a scream of pain out, confusing him even further.
Death ventures further into the castle finally meeting Dracula's former servant Olrox inside the castle. Olrox confirms that the current set of events are of his doing and that the humans in the castle are the remnants of Graham's cult that has bowed to follow the Vampire. Death mocks Olrox if he wants to play at replacing Dracula, but Olrox merely states he wants to control both humans and Chaos out of curiosity of what can be done by doing so, emphasizing that Chaos is born of humans and that Death is born out of Chaos, therefore if he can control humans then Chaos could potentially disappear. Death declares Olrox a traitor and the two of them clash with Death summoning his sickles and Olrox summoning bats, both of them cancelling each other. Olrox goes to the courtyard and Death follows with the two clashing without any clear advantage, but then Olrox lures Death into a trap as a magic formation made by Graham's followers summons a large bloody hand that entraps Death depriving him of his power and taking it with him.
Death remains trapped and weakened until his soul encounters the damaged body of Curtis Lang that had been shot mercilessly by Graham's Cult multiple times and at the verge of dying. Death encounters Curtis whose only wish is for the safety of his partner Michelle Danasty. Death then takes possession of the young man's dying body, which is later found by Michelle and restored back to health by Hammer after he uses a potion on his body, seemingly with memory loss the possessed Curtis does not recall the recent series of events.
The two venture in to the castle with Michelle destroying the horde of Zombies while he remains unfazed by them. Michelle continuously tries to protect him and encourage him to remember although he only has vague hints, his change of personality and attitude worrying Michelle the more they explore. The two enter the Clock Tower where they are attacked by a Harpy that Death kills easily using Gale Force by slashing it repeatedly. Michelle is amazed that "Curtis" can use a high level spell and attributes it to Julius' training. "Curtis" remains mostly quiet and keeps advancing, with Michelle fearing that the person in from him isn't Curtis anymore and puzzled at the fact the Harpy never screamed in pain.
Finally "Curtis" and Michelle reach Dracula's throne. Michelle wonders why "Curtis" hasn't used his Holy Whip and has him touch the whip thinking it may trigger some memories back, but "Curtis" warns her that he cannot hold a holy item in his current state and much to Michelle's surprise his hand burns, the duo then encounter Olrox with Death recovering his memories and Michelle learning the truth behind Curtis. Death has Michelle stand aside out of respect for Curtis' wish and fights against Olrox once more.
Olrox explains that the current castle is a copy made by Graham's cult made up possible through the brief Eclipse in the area that allowed Legion and the Puppet Master to be summoned, with Legion being the backbone of the castle while the Puppet Master created puppet copies of the castle's monsters. Olrox further explains that the entire scheme was possible solely out of Graham's Cult wish to follow his master finding humans interesting and the thrill of fighting Death equal to when he faced Alucard. Olrox summons the bloody hand once more but Death is able to put an end to it, forcing Olrox to reveal that the castle is a giant Legion and forming a massive body out Legion's parts. As the battle escalated to inhuman proportions Michelle was paralyzed with fear, but honoring her training and Curtis' wish for her to be happy, Michelle decided to fight using her athletic abilities to reach the ceiling of the room and shot an arrow at Olrox during a brief opening which allowed Death to overpower Olrox and defeat him and Legion.
With Olrox beaten the castle began to crumble. Michelle asked Death if Curtis would not be able to come back but Death didn't really respond. As he disappears he states that while they had a common purpose this time around they are essentially still enemies and leaves. Curtis is eventually revealed to be alive and Michelle theorizes that Curtis was able to live because Death possessed his body while he was still alive, and also imagining that perhaps Death did something to his body. She contemplated how Death is a creature unlike any other she has seen.
Appearance
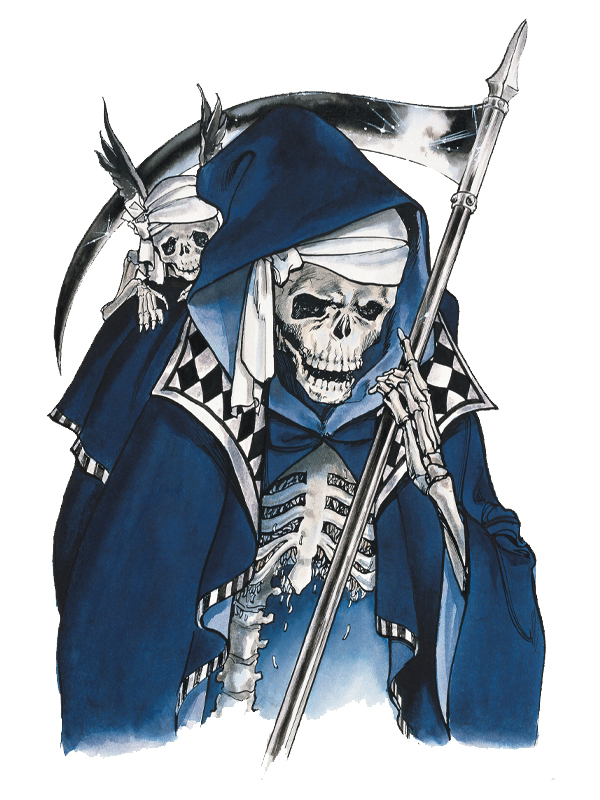
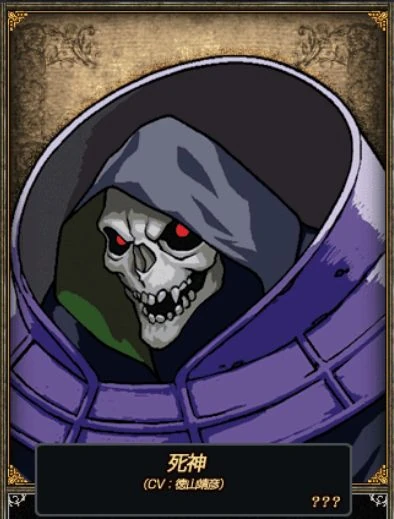
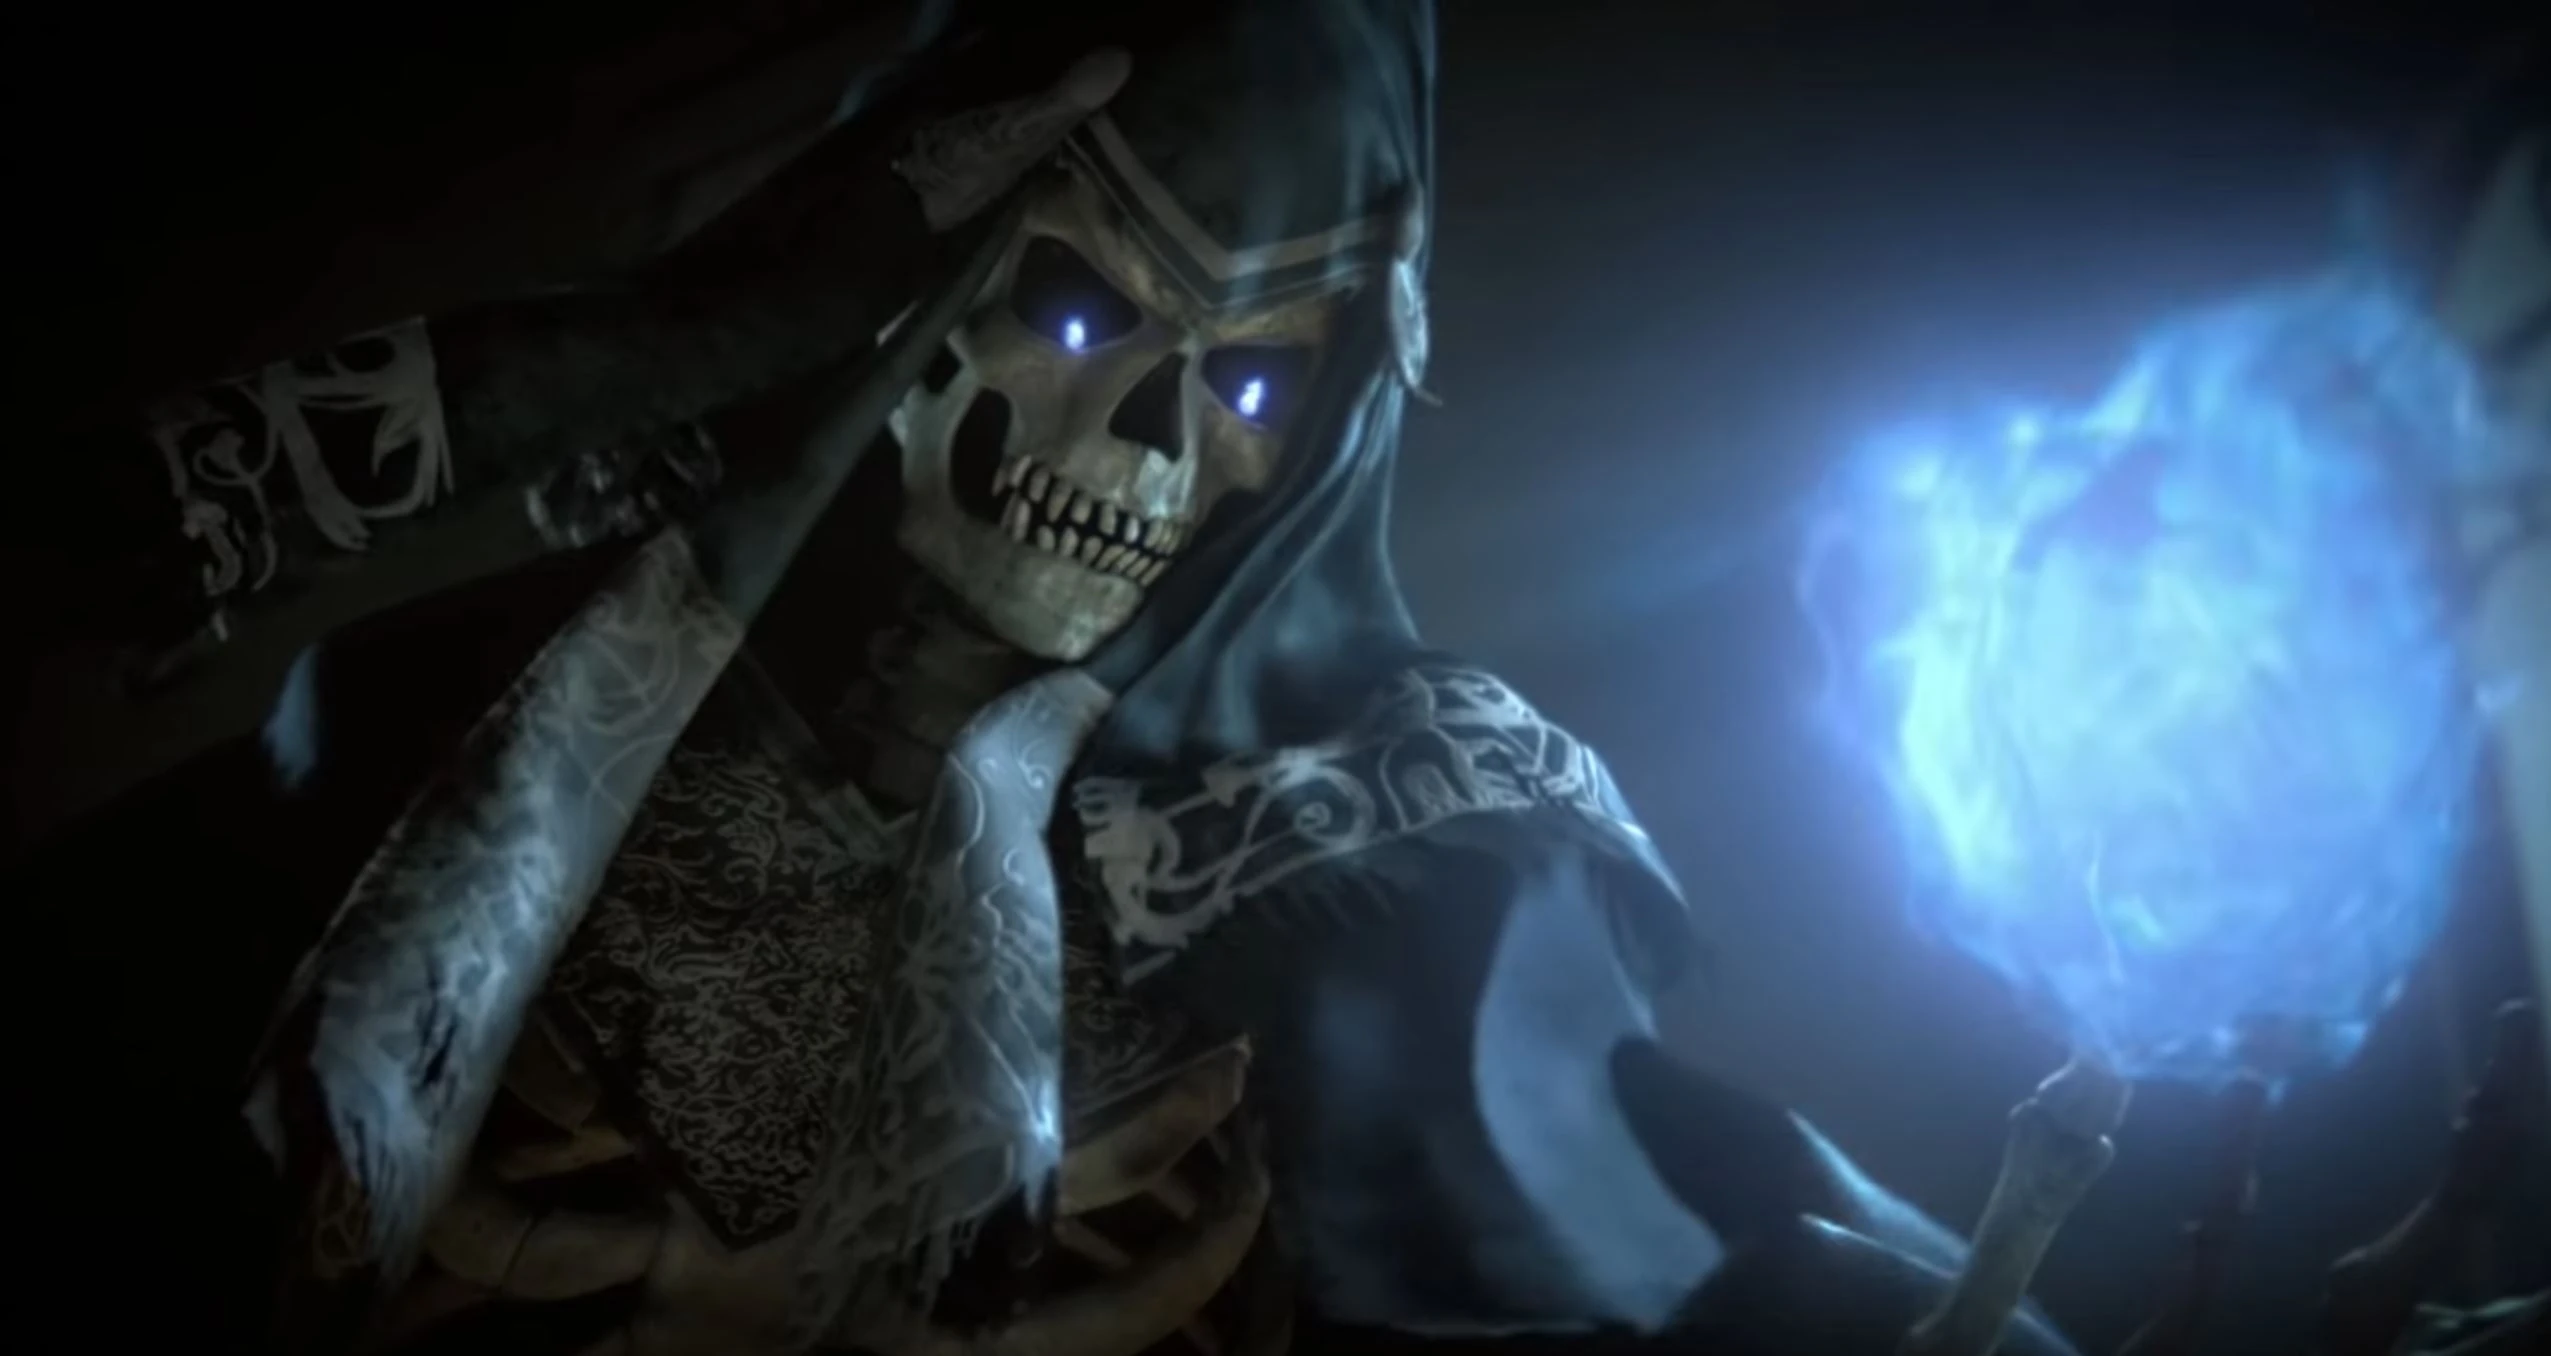
Death's specific physical appearance varies from game to game, although in general he appears as a skeletal figure adopting a black cloak and carrying a scythe. Although his eyes are generally missing, sometimes he has glowing red eyes, such as his character portrait in Portrait of Ruin.
When transforming into his true form, his second form has varied significantly across games, from a giant skull to a more serpentine skeleton, or even just a slightly modified version of his default appearance.
Personality
Death possesses absolute and undying loyalty toward his master, always placing his lord above anything else, a loyalty that has earned him his place as Dracula's most trusted servant and a notorious recognition among warriors. While he is technically Dracula's second-in-command, he is rarely (if ever) seen leading his forces, instead preferring to act alone in most cases. Whenever his lord is not present, he begins to immediately start to search for him. In the instances in which Dracula isn't fully revived, Death has proved to be a calculating schemer and manipulator, often using the protagonists to indirectly and unwillingly aid in the resurrection of his lord.
It should be noted that his loyalty toward Dracula may increase with time, as no matter who is against his lord, Death will fight to defend him. This is seen mostly with Alucard, as even being the son of his master did not stop Death from attacking him, albeit he showed some level of consideration by merely stealing his equipment at first, although he did not hesitate to attack him later. His greatest display of loyalty is seen in Portrait of Ruin, where he actually fights alongside Dracula for the first time, even allowing himself to be used as a weapon, and going as far as offering his soul to Dracula so that his master could power up.
His loyalty to Dracula post 1999 seems to be rather questionable, however. When Death encountered Soma Cruz, the reincarnation of his master, he lost his ego. In the Kabuchi no Tsuisoukyoku novel, Death explains that he will serve those who heed the calling of Chaos, and the novel even acknowledges that Death and Soma have not exchanged a single word before the events of 2037. It is possible that Chaos may exert some sort of influence on him that makes him attack without warning, that the existence of other potential Dark Lords, such as Graham Jones, may have misled Death into thinking his master is elsewhere, or even that Death ignored Soma for he had no intention of becoming the Dark Lord (and thus, heeding the calling of Chaos) while the other candidates did. Aside from this, he is also willing to work with his enemies if it means fulfilling his objectives, which is implied in Portrait of Ruin and confirmed in Kabuchi no Tsuisoukyoku, although it is to be made clear that while willing to work with them, that does not mean he renounces his initial views of them as his enemies. Genya Arikado also mentioned that Death desired more the resurrection of Dracula than he desired Dracula himself.
In battle
- Main article: Death/Abilities
- Main article: Death/Enemy Data
Death is a Grim Reaper. As such, he is never seen without his Scythe. His attacks and appearances have changed from game to game, but in general, he always summons floating sickles out of thin air to hunt down his opponents.
Quotes
Castlevania: Lament of Innocence
- (When summoning mini-skulls) Minions!!
- (When launching fireballs) Deadly Tempest!
- (When firing the energy laser) Die!
- (When performing a Demonic Megiddo) It's over.
- (When defeated) Impossible!
- (When the player dies) Game over comes to all.
Castlevania: Curse of Darkness
- Feel the fires of hell!
- Out of my way!
- Impossible! A mere human beats me?!
Castlevania: The Dracula X Chronicles
- Time to test your strength!
- Next time, it won't be so easy!
- You will go no further!
- Feel my true power!
- Series attack!
- Face me, boy!
Castlevania: Order of Ecclesia
- I shall cut you down!
- (Player dies) The candlelight of your soul has burned itself out.
Item Data
| Item Data: Death | ||||||||
|---|---|---|---|---|---|---|---|---|
| Image | Name - Game Type - Users Description |
Attributes / Consume | Statistics / Sell | Found | Notes | |||
| This is your strongest knife, and it has a mysterious power. | Consume: 2 Hearts |
Drop: Death |
Effect: Multi-Hit Knife Throw | |||||
| 1 of 5 Treasures. LCK +10 | LCK +10 |
Find: Cave Guard: Death |
||||||
| By pressing DOWN/UP + JUMP, the user may perform a HIGH JUMP. | Find: Luminous Cavern (Castle A) Guard: Death |
|||||||
| Attacks enemies using sickles. (Attacks enemies using a large sickle.) | Attrib: Sword Consume: 10 MP/sec |
20 ATK |
Drop: Death |
|||||
| Summon the Grim Reaper's scythe to attack enemies. | Attrib: Slashing Consume: 10 MP/sec |
Rarity: 100% drop rate. Drop: Death |
||||||

|
||||||||
| A drum beat from the black depths; merely holding it sends shivers down your spine. | Sell: $666 |
Steal: Death Lv.51 |
Evolve: Death's Scythe | |||||
| Medal awarded for defeating Dracula's servant, Death. | Sell: (cannot be sold) |
Drop: Death Conditions: Defeat Death without taking damage. |
||||||
| Attack with the left head of Cerberus, guardian of Hell. | Attrib: Slash Consume: 16 MP |
ATK +18 |
Find: Mechanical Tower (Dracula's Castle) |
Special: Glyph Unions: + Darkness Glyph = Union Umbra; + Weapon Glyph = Pluto; + Light Glyph = Universitas; + Other = Pulsus | ||||
| Sword that sometimes turns those it strikes into stone. | Attrib: Slash, Petrify #hands: 1 |
ATK +10 Sell: $3,000 |
Rarity: *** Find: Chapter 5 Drop: Death |
|||||
| Famed Japanese samurai sword. | Attrib: Slash #hands: 1 |
ATK +20 Sell: $3,000 |
Rarity: *** Drop: Death (Chapter 5 Normal) |
Special: ↓↘→ + [Attack] for Critical Art (15 MP) | ||||
| Raiment once worn by Death. | Attrib: Petrify +13, Holy -13, Darkness +13, Curse +13, Poison +13 |
MP +44, DEF +26, STR +4, CON +4, INT +4, MND +4, LCK +4 Sell: $11,000 |
Rarity: ***** Find: Chapter 5 (Hard) Drop: Death, R. Grim Reaper |
|||||
| Summon the Grim Reaper's scythe. | Attrib: Slash Consume: 25 MP |
ATK +6 |
Rarity: ***** Bind: Death First Obtained: Chapter 5 |
|||||
| Summon the Grim Reaper's scythe to attack enemies. | Attrib: Slash Consume: 3 MP |
ATK +6 |
Rarity: **** Steal: Death (0.3%) |
Effect: Deathscythe | ||||
| A scythe used by the Grim Reaper in ancient times. | Attrib: Slash Consume: 20 MP |
ATK +9 |
Rarity: ** Bind: R. Grim Reaper First Obtained: Chapter 10 |
|||||
| Summon the 8-bit Grim Reaper's scythe to attack enemies. | Attrib: Slash Consume: 3 MP |
ATK +7 |
Steal: R. Grim Reaper (3.5%) First Obtained: Chapter 10 |
Effect: Deathscythe | ||||
Other appearances
Kid Dracula (GB)
Death makes a cameo as part of the Password screen for that game, where he holds up a sign carrying four digits and says: "Wake up, Master" (presumably referring to the titular protagonist).
Pachislot Akumajō Dracula
- Main article: Death/Pachislot
Death makes an appearance in the Pachislot Akumajō Dracula series (I, II and III). He appears as Zead in many of the encounter scenes, but when fought, morphs into a towering Death similar in form to that found in Castlevania: Curse of Darkness. In the second game, Zead arrives to test Trevor. Three floating cards are displayed which represent which boss you may have to fight. This is similar to the mini-boss battles selected by whipping a floating card during the Death battle in Castlevania: Bloodlines.
Castlevania Judgment
- Main article: Death/Judgment
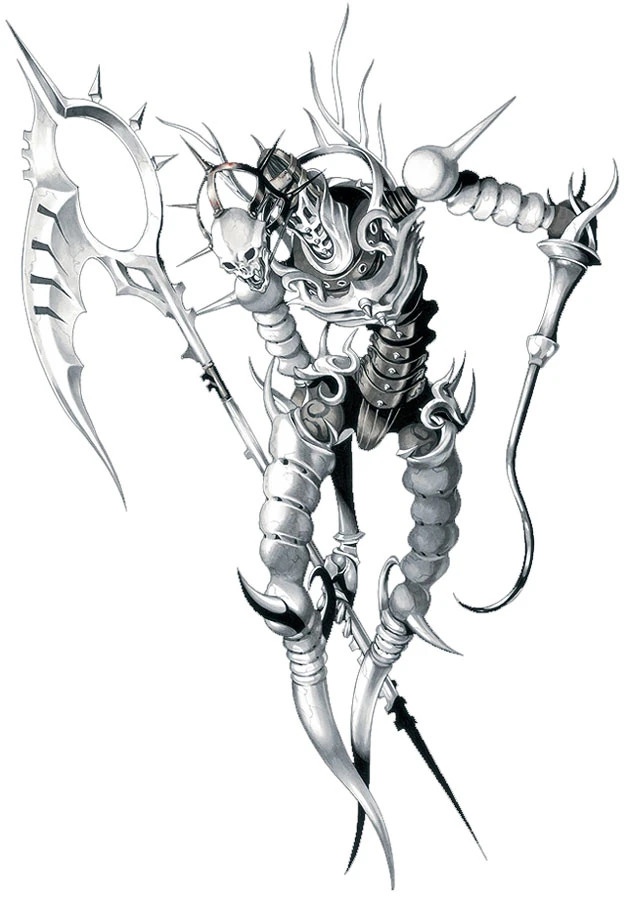
Death made his first playable appearance in the 3D fighting game Castlevania Judgment. His appearance is based more on his second forms (especially that which appeared in Arcade, which is more human-like), which are more skeletal and lack a cloak. He is equipped with a scythe on his right hand and a hook that replaces his left.
His battle theme is "Evil's Symphonic Poem" from Castlevania: Lament of Innocence. Just before the song's loop, an arrangement of "Poison Mind" can be heard.
Non-Castlevania appearances
Death in Knightmare.
Death appears in another Konami game for the MSX system: Knightmare, where he is the boss of the second stage. His attack mirrors the one in Castlevania/Vampire Killer, as he throws scythes in a circular pattern.
Although not a cameo of Death himself, he was referenced with the character Screaming Mantis in Metal Gear Solid 4: Guns of the Patriots, where she, like Death, often levitated and stayed away from the player character while also throwing scythe-like weapons. Like the Castlevania franchise, the Metal Gear franchise was also made by Konami.
Death also made a cameo on the logo for the Private Force "Kill Count" in the online FOB events "New World Order", "Bound Dragons", and "Freedom from Oppression" in Metal Gear Solid V: The Phantom Pain.

Death in Super Smash Bros. Ultimate.
Death made an appearance in the trailer for Simon Belmont's reveal in Super Smash Bros. Ultimate, where he kills Luigi via his scythe, until he in turn is defeated by Simon Belmont shortly thereafter. His weapon, Death Scythe, is an usable item in the game. He is also part of Dracula's Castle stage. His design for Ultimate is based on his appearance in Castlevania: Lament of Innocence.
Trivia
- Note that, in Japanese mythology, a "death god" (shinigami) is the name for a type of being (of many) rather than the western idea of a single Grim Reaper, which may explain his status as a minion within the games. It is noteworthy, however, that Death is called "DEATH" in a minority of games - even the Japanese versions - making it possible that Death is, in fact, the sole Grim Reaper from western folklore.
- Galamoth has his own version of Death ten thousand years in the future, the Time Reaper. Interestingly, the Time Reaper looks like Death himself in Curse of Darkness, even having Death himself acknowledge this in his True Story Mode.
- Despite his loyalties to Dracula, Death fights Soma Cruz in both games that he has appeared in, even though, technically, Soma is the reincarnation of Dracula. In the light novel Akumajō Dracula: Kabuchi no Tsuisoukyoku, Death explains he will serve anyone who is willing to heed the calling of Chaos and take up Dracula's name. It is possible that Death wanted Soma dead to allow the power of Chaos to possess Soma, and therefore revive Dracula, or that he had no interest on Soma since he didn't want to heed the calling of Chaos while other candidates did.
- In Belmont's Revenge, when the player walks across the bridge that leads to Dracula, statues in the background that resemble Death can be seen.
- Often, Death's HP/EXP values contain only fours, or they are multiples of four in some obvious way. This is a Japanese-language-specific pun, as the pronunciation of the number "four" and the word for "death" are phonetically identical ("shi").
- Death disguising himself as a priest in Curse of Darkness is inspired by a scene in Ingmar Bergman's classic 1957 film, The Seventh Seal.
- The fact Death is mostly fought in or near a clock tower may be because the concept of death is sometimes associated with time.
- Death's appearance planned in Castlevania: Resurrection looks like the pale horse in Gustave Doré's painting Death on the Pale Horse
- Although Death was not present in Castlevania: The Adventure, he was added into the game's remake, Castlevania: The Adventure ReBirth.
- Aside from his role as a boss in Dawn of Sorrow, Death also makes a brief cameo in the game over sequence for the same game, where he's seen holding a white flame (implied to be Soma's soul).
- Similarly, even though Death does not have a major role in Order of Shadows, he does make a cameo during the game over sequence, where he appears and descends upon Desmond Belmont's corpse.
References
- Mr. P's Castlevania Realm
- Castlevania: Portrait of Ruin Bestiary by Darth Nemesis at GameFAQs.com
- Castlevania: Portrait of Ruin Walkthrough and FAQ by Zach "Darko" Long at GameFAQs.com
- Konami of Europe's Death Profile for Castlevania.
- ↑ 1.0 1.1 Castlevania: Portrait of Ruin instruction booklet, page 23.
- ↑ Death never really dies, even if defeated by a character. As a character, Death is neutralized for a short amount of time by the protagonists who encounter him, but as a concept, Death never disappears.
- ↑ Akumajō Dracula: Kabuchi no Tsuisoukyoku
External links
- Death at the Castlevania Fan Wiki
| Castlevania: Lament of Innocence |
|---|
| Characters |
| Protagonist |
| Leon Belmont |
| Supporting cast |
| Sara Trantoul • Rinaldo Gandolfi • Mathias Cronqvist |
| Antagonists |
| Joachim Armster • Walter Bernhard • Death |
| Lesser roles |
| Elisabetha Cronqvist • Pumpkin |
| Bosses |
| Main bosses |
| Undead Parasite • Golem • Succubus • Medusa • Joachim • Walter • Death |
| Minor/optional bosses |
| Flame Elemental • Frost Elemental • Thunder Elemental • Doppelganger • Forgotten One |
| Areas |
| Forest of Eternal Night • Castle Entrance • House of Sacred Remains • Anti-Soul Mysteries Lab • Ghostly Theatre • Dark Palace of Waterfalls Garden Forgotten by Time • Pagoda of the Misty Moon • Prison of Eternal Torture |
| Music |
| Castlevania: Lament of Innocence Original Soundtrack |
| Guides |
| Futabasha Guide • NTT Pub Guide • Shinkigensha Guide • BradyGames Guide |
| Archives |
| Bestiary • Inventory • Joachim Mode • Pumpkin Mode |
| Castlevania | |
|---|---|
| Characters | |
| Simon Belmont • Dracula | |
| Bosses | |
| Phantom Bat • Queen Medusa • Mummy Man • Frankenstein & Igor • Grim Reaper • Count Dracula • Spirit of Dracula | |
| Stages | |
| The Castle Entrance • The Chapel • The Castle Ruins The Catacombs • The Dungeons • The Clock Tower and the Castle Keep | |
| Music | |
| Underground • Vampire Killer • Stalker • Wicked Child • Walking on the Edge • Heart of Fire • Out of Time Nothing to Lose • Poison Mind • Black Night • Voyager • Akumajō Dracula Famicom Best | |
| Guides | |
| Akumajō Dracula Perfect • The Official Nintendo Player's Guide • NES Game Atlas | |
| Archives | |
| Bestiary • Inventory | |
| Castlevania: Bloodlines |
|---|
| Characters |
| Protagonists |
| John Morris • Eric Lecarde |
| Antagonists |
| Elizabeth Bartley • Drolta Tzuentes • Dracula |
| Bosses |
| Hellhound • Armor Battler • Wizard • Heavy Armor • Great Axe Armor • Golem • Snake Dragon • Gargoyle The Creature • Gear Steamer • Talos • Silhouette Demon • Princess of Moss • Death • Medusa |
| Stages |
| Ruins of the Castle Dracula • Atlantis Shrine • The Leaning Tower of Pisa The Munitions Factory • Versailles Palace • The Castle Proserpina |
| Music |
| Akumajō Dracula X |
| Guides |
| MegaDriveFAN |
| Archives |
| Bestiary • Inventory |
| Castlevania: Dracula X |
|---|
| Characters |
| Richter Belmont • Annet • Maria • Dracula |
| Bosses |
| Keruberosu • Myotia • Dyurahan • Minotaurusu • Ghost • Lypuston • Salamander • Carmilla • Death |
| Areas |
| Common areas |
| Burning Town • Gate and Entrance to Evil Castle • Great Hall • Clock Tower • Count Dracula |
| Main path |
| Dungeon • Courtyard |
| Alternate path |
| Caves • Stage 5' |
| Music |
| Divine Bloodlines • Dracula Music Collection |
| Archives |
| Bestiary • Inventory |
| Castlevania: Aria of Sorrow |
|---|
| Characters |
| Protagonists |
| Soma Cruz • Mina Hakuba • J./Julius Belmont • Yoko Belnades • Genya Arikado (Alucard) • Hammer |
| Antagonist |
| Graham Jones |
| Bosses |
| Creaking Skull • Manticore • Great Armor • Big Golem • Headhunter • Death • Legion • Balore • Graham • Belmont • Chaos |
| Areas |
| Castle Corridor • Chapel • Study • Dance Hall • Inner Quarters • Floating Garden • Clock Tower Underground Reservoir • Underground Cemetery • The Arena • Top Floor • Forbidden Area • Chaotic Realm |
| Music |
| Castlevania: Aria of Sorrow & Castlevania: Dawn of Sorrow Original Soundtrack |
| Guides |
| Futabasha Official Guide • NTT Pub Official Guide |
| Archives |
| Bestiary • Inventory • In-Game Formula • Julius Mode • Voice Translations |
| Castlevania: Dawn of Sorrow |
|---|
| Characters |
| Protagonists |
| Soma Cruz • Mina Hakuba • Julius Belmont • Yoko Belnades • Genya Arikado (Alucard) • Hammer |
| Antagonists |
| Celia Fortner • Dario Bossi • Dmitrii Blinov • Soma Cruz (Julius Mode) |
| Bosses |
| Flying Armor • Balore • Malphas • Puppet Master • Rahab • Gergoth • Zephyr • Bat Company Paranoia • Aguni • Abaddon • Death • Menace |
| Areas |
| The Lost Village • Wizardry Lab • Garden of Madness • The Dark Chapel • Demon Guest House • Condemned Tower Cursed Clock Tower • Subterranean Hell • Silenced Ruins • The Pinnacle • Mine of Judgment • The Abyss |
| Music |
| Castlevania: Aria of Sorrow & Castlevania: Dawn of Sorrow Original Soundtrack |
| Guides |
| Castlevania: Dawn of Sorrow - The Official Strategy Guide Konami Akumajō Dracula: Sōgetsu no Jūjika Official Guide |
| Archives |
| Bestiary • Inventory • Julius Mode • Voice Translations |
| Castlevania: The Arcade |
|---|
| Characters |
| Protagonists |
| Vampire Hunter - Lady Gunner - Little Witch |
| Antagonists |
| Dracula |
| Bosses |
| Death - White Dragon - Dullahan - Minotaur - Water Dragon - Were Wolf - Harpy |
| Stages |
| Ruins - Palace - Underground Waterway - Ramparts - Clock Tower |
| Music |
| Akumajō Dracula Best Music Collections BOX |
| Archives |
| Bestiary |