No edit summary Tag: rte-source |
|||
| (49 intermediate revisions by 13 users not shown) | |||
| Line 1: | Line 1: | ||
| + | '''Hard Mode''', or simply '''Hard''', is an [[Alternate Mode|alternate mode]] frequently present in games that conform the ''[[Castlevania (series)|Castlevania]]'' series. This mode generally becomes available to the player after completing the game on the [[Normal Mode|Normal]] difficulty. In it, the player can go through the game a second time with a harder difficulty setting. |
||
| − | '''Hard Mode''' first appeared in the very first ''[[Castlevania (video game)|Castlevania]]'' game made and most games have followed this tradition. It is usually playable after the game is beaten on Normal Mode. Often times, it features additional enemies in the area, enemies being replaced by more powerful enemies, enemies gaining extra characteristics, faster enemies, and reduced [[Attack|attack]] and [[Defense|defense]] ability for the player. This mode has had different names in some games, such as '''Crazy Mode'''. In ''[[Castlevania: Judgment]]'', there is an even harder mode that is unlocked after the completion of Hard Mode: '''Brutal Mode'''. |
||
| + | ==Overview== |
||
| − | ==Game Specific Information== |
||
| + | Hard Mode first appeared in the very first ''[[Castlevania (video game)|Castlevania]]'', and since then most games have followed this tradition. It is usually playable after the game is beaten on [[Normal Mode]]. Oftentimes, it features additional enemies in the area, enemies being replaced by more powerful enemies, enemies gaining extra characteristics, faster enemies, and reduced [[attack]] and [[defense]] abilities for the player. This mode has had different names in some games, such as "'''Crazy Mode'''". |
||
| + | |||
| + | In ''[[Castlevania Judgment]]'', there is an even harder mode that is unlocked after the completion of Hard Mode: '''Brutal Mode'''. |
||
| + | |||
| + | ==Game specific information== |
||
===''[[Castlevania (video game)|Castlevania]]''=== |
===''[[Castlevania (video game)|Castlevania]]''=== |
||
| − | In ''Castlevania'', Hard Mode is an additional quest that takes place after |
+ | In ''Castlevania'', Hard Mode is an additional quest that takes place after the player beats [[Dracula]] in [[Normal Mode]]. As there are no saves or [[Name Entry Screen|passwords]] in the original [[Nintendo Entertainment System|NES]] version of this game, it is not possible to play Hard Mode without first playing through the entire Normal Mode during that session. It features additional enemies, such as [[Bat]]s or [[Medusa Head]]s in awkward places. Some of the enemies, such as [[Zombie]]s, move faster. Each enemy deals twice the damage they normally do, even in early levels. Additional hidden [[crown]]s, which are worth many points, can be found in this mode. Every time the player beats Hard Mode, another round of Hard Mode can be started. |
===''[[Castlevania: The Adventure]]''=== |
===''[[Castlevania: The Adventure]]''=== |
||
| − | Hard Mode returns in ''Adventure''. Upon beating the game in Normal Mode, |
+ | Hard Mode returns in ''The Adventure''. Upon beating the game in Normal Mode, the player can play through the game again with damage from creatures increased twofold. This will continue to increase with each subsequent loop through the four stages. |
| + | *Stage 5 to 8: Enemy damage ×2 |
||
| + | *Stage 9 to 12: Enemy damage ×4 |
||
| + | *Stage 13 to 16: Enemy damage ×8 |
||
| + | *Stage 17 to 20: Enemy damage ×16 (instant death) |
||
| + | |||
| + | Clearing Stage 20 will not increase the difficulty any further. However, the score and the stage number will still increase. |
||
| + | |||
| + | ===''[[Castlevania II: Belmont's Revenge]]''=== |
||
| + | Hard Mode exists in the [[Game Boy]] sequel. However, it is only accessible via [[Name Entry Screen|Password]] (beating the main game will not allow carrying on into 'Hard Mode' like in the previous Game Boy or NES games). |
||
| + | |||
| + | Hard Mode in this game is very similar to the Normal mode, as the enemies and damage do not change from the regular gameplay. Despite this, there are a few differences that add to the challenge: |
||
| + | *The [[Vampire Killer (whip)|Vampire Killer]] will downgrade immediately upon contact with some enemies, making the whip system much more in-line with ''Castlevania: The Adventure''. |
||
| + | *There are no [[Name Entry Screen|Passwords]] for Hard Mode other than the initial Password to begin the game. Therefore, there is no way to resume progress, meaning players will have to get to the end in one sitting (although 'Continues' are still unlimited). |
||
===''[[Castlevania III: Dracula's Curse]]''=== |
===''[[Castlevania III: Dracula's Curse]]''=== |
||
| − | In ''Dracula's Curse'', Hard Mode can be played after beating Dracula in Normal Mode. Because of the password system, this is the first game where |
+ | In ''Dracula's Curse'', Hard Mode can be played after beating Dracula in Normal Mode. Because of the password system, this is the first game where the player can start a new session in Hard Mode, provided the game has been beaten before. The player starts Hard Mode with the character they beat Normal Mode. The player takes more damage in this mode. Additional creatures have been added and others have been swapped with more powerful ones. There are some creatures that appear in this mode that do not appear in the normal game, such as floating skulls that move similar to [[Medusa Head]]s, but with much more erratic and unpredictable up and down motions. |
| + | |||
| − | Starting a new game with the secret name "AKAMA" at the password screen, starts a new game with [[Trevor Belmont|Trevor]] only, already in Hard Mode without the need of beating Normal Mode. |
||
| + | Starting a new game with the secret name "AKAMA" at the [[Name Entry Screen|password]] screen starts a new game with [[Trevor Belmont|Trevor]] only already in Hard Mode without the need of beating Normal Mode. |
||
| + | |||
| + | ===''[[Castlevania: Bloodlines]]''=== |
||
| + | Entering the [[Konami Code]] at the title screen (a sound will confirm it) enables the selection of the "'''Expert'''" difficulty in the option screen. The code also gives the player the possibility of starting the game with 9 lives if it is entered at the title screen after the music settings in the option screen have been set to BGM 05 and SE 073. |
||
| + | |||
| + | ===''[[Castlevania: Harmony of Dissonance]]''=== |
||
| + | Enter "'''HARDGAME'''" at the [[Name Entry Screen|Name Entry]] screen. A sound will play if the code was entered successfully. |
||
| + | |||
| + | ===''[[Castlevania: Aria of Sorrow]]''=== |
||
| + | In this game, hard difficulty can be played once the game has been beaten once. In this mode, enemies will receive 20% less damage. Their [[Tactical Soul|souls]] will be easier to get as long as [[Soma Cruz|Soma]] has not obtained them before. The [[Kaiser Knuckle]], [[Silver Gun]], [[Tear of Blood]], [[Death's Scythe]] and [[Death's Robe]] can only be obtained in this mode, scattered throughout the many areas that conform the castle. |
||
| + | |||
| + | ===''[[Castlevania: Lament of Innocence]]''=== |
||
| + | [[File:Crazy of castlevania.jpg|right|160px]] |
||
| + | '''Crazy''' mode is one of the two first alternate modes unlocked in ''Lament of Innocence'', along with [[Joachim Mode]]. After finishing the game as [[Leon Belmont]], a new game with a harder difficulty setting can be started. The changes on difficulty can be summed up on this three points: |
||
| + | *Enemy placement changes. Sometimes, rooms will have more enemies than in Normal Mode, or feature more powerful enemies replacing them. |
||
| + | *All enemies will have new attacks and the pattern for their regular attacks will change. |
||
| + | *Some bosses will spam new and more powerful attacks, although sometimes said increase on difficulty will be the result of an environmental change. |
||
| + | |||
| + | After completing this mode, the [[Mobius Brooch|Mobius's Brooch]] will become available for purchase at [[Rinaldo Gandolfi|Rinaldo]]'s [[Shop#Castlevania: Lament of Innocence|shop]]. |
||
===''[[Castlevania: Curse of Darkness]]''=== |
===''[[Castlevania: Curse of Darkness]]''=== |
||
| − | In ''Curse of Darkness'', the player can unlock |
+ | In ''Curse of Darkness'', the player can unlock Hard Mode (called '''Crazy Mode'''), as well as [[Trevor Mode]], which allows the player to play as [[Trevor Belmont/Curse of Darkness|Trevor Belmont]]. It is unlocked by starting a new game with "'''@CRAZY'''" as the save name. |
| − | In this mode, |
+ | In this mode, most enemies are ×10 and strong enemies are ×20 the level compared to [[Hector]], while retaining the same [[experience]] given in [[Normal Mode]], making the game much more challenging and making it harder to level up. The enemies A.I. is also slightly improved as they can sometimes synchronize attacks in order to break Hector's guard. Similar to ''[[Castlevania: Lament of Innocence|Lament of Innocence]]'', finishing the game on this difficulty allows the player to purchase the [[Mobius Brooch]], which reduces the cost of the [[Innocent Devil]]s' skills to zero. |
| + | |||
| + | ===''[[Castlevania: Dawn of Sorrow]]''=== |
||
| + | As usual, Hard mode becomes available after completing the game once in Normal mode. To access it, select "Game Start" from the title menu and then "Select Data" from the files menu; a bat-like icon with the word "Clear" will appear on the next screen above your old, cleared file; select it (not the actual file icon below it) and the option to start a new game will be given to start a [[New Game Plus|new game+]] either on Normal or Hard difficulty. |
||
| + | |||
| + | Hard mode has the following gameplay changes: |
||
| + | *All [[Medusa Head]]s become Gold Medusas. |
||
| + | *[[:category:Statistics|Stats]] no longer level up continuously. The player needs to level up a few times in order to gain stat boosts. |
||
| + | *[[Environmental hazard|Traps]] (spikes, blades, etc.) deal about double damage. |
||
| + | *Some enemies are leveled-up and have more HP. |
||
| + | |||
| + | Upon completing Hard Mode, [[Hellfire]] is added to the player's [[Bullet Soul]]s. |
||
===''[[Castlevania: Portrait of Ruin]]''=== |
===''[[Castlevania: Portrait of Ruin]]''=== |
||
| Line 22: | Line 70: | ||
*Level 25 or lower: [[Twin Bee]] ([[Intelligence|INT]] +50). |
*Level 25 or lower: [[Twin Bee]] ([[Intelligence|INT]] +50). |
||
*Level 1: [[Konami Man]] ([[Strength|STR]] +50). |
*Level 1: [[Konami Man]] ([[Strength|STR]] +50). |
||
| + | |||
Each of the rewards above may be obtained only once, but if the player feels up to the challenge, they can freely skip an easier level cap in favor of a more difficult one with little fear of missing that cap's reward. |
Each of the rewards above may be obtained only once, but if the player feels up to the challenge, they can freely skip an easier level cap in favor of a more difficult one with little fear of missing that cap's reward. |
||
| − | The following are differences from Normal Mode: |
+ | The following are differences from [[Normal Mode]]: |
| − | *All damage dealt by the player is reduced by 25% |
+ | *All damage dealt by the player is reduced by 25% compared to Normal. |
| − | *All enemies have a bonus to their [[ |
+ | *All enemies have a bonus to their [[attack]] power that scales with the player's level. This starts at different points, depending on the cap chosen, but as a player levels up, enemies deal more and more damage. This caps out at 100+ per hit when the player reaches the cap chosen and is not affected by a character's [[Defense|DEF]] or [[Mind|MND]]. |
| + | *Some enemies and bosses receive additional traits and/or bonuses compared to Normal Mode. All known changes are listed below: |
||
| − | *Some enemies receive additional traits and/or bonuses compared to Normal Mode. To name some examples: a [[Zombie|zombie]] moves faster and inflicts [[Poison]] on a successful hit, whereas a [[Tanjelly|tanjelly]], in addition to its poison, now [[Curse|curses]] on a successful hit, and finally, all [[Medusa Heads|Medusa heads]] are golden, and thus, there will be no Medusa heads that are incapable of causing [[Stone]] on a hit. |
||
| + | |||
| + | <div class="NavFrame" style="width:65%;-moz-border-radius:12px;border:0.5px solid gray;"><div class="NavHead" style="font-weight:bold; background-color:#8c8c8c; text-align:left;"> |
||
| + | <font color=black>Enemy changes: Click to expand </font></div> |
||
| + | <div class="NavContent" style="font-weight:normal;text-align:center;display:none;"> |
||
| + | {|class="prettytable" style="width:auto%;font-size:1.00em;background-color:#8c8c8c;" |
||
| + | !<font color=black>Enemy </font> |
||
| + | !<font color=black>No. </font> |
||
| + | !<font color=black>Name </font> |
||
| + | !<font color=black>Changes </font> |
||
| + | |- |
||
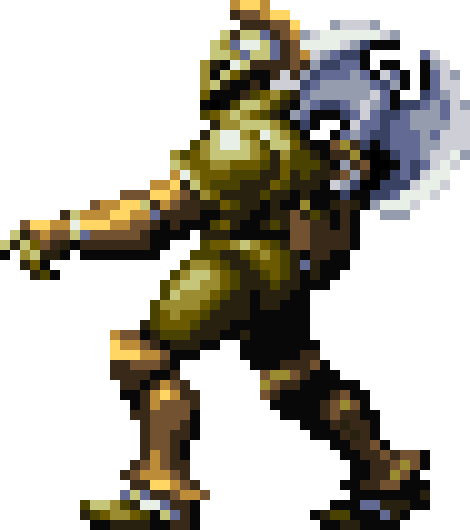
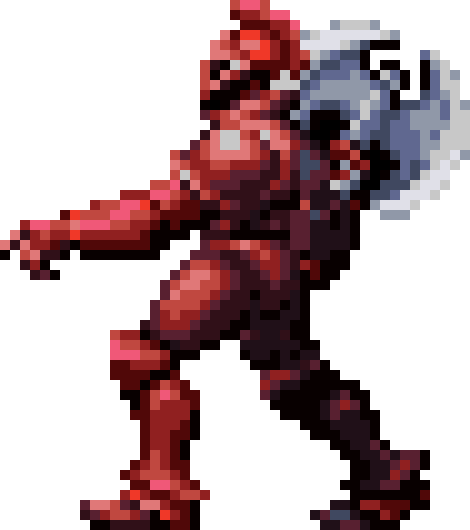
| + | |<font color=#8c8c8c>[[File:PoR - Zombie.gif|40px]] </font> |
||
| + | |<font color=black>1. </font> |
||
| + | |<font color=black>[[Zombie#Castlevania: Portrait of Ruin|Zombie]] </font> |
||
| + | |<font color=black>Walks faster and inflicts [[Poison]] on contact. </font> |
||
| + | |- |
||
| + | |<font color=black>[[File:OOE-Bat.gif|30px]] </font> |
||
| + | |<font color=black>2. </font> |
||
| + | |<font color=black>[[Bat]] </font> |
||
| + | |<font color=black>Moves faster and adjusts its flight path to hit the player if they move. </font> |
||
| + | |- |
||
| + | |<font color=black>[[File:Axearmor.gif|60px]] </font> |
||
| + | |<font color=black>4. </font> |
||
| + | |<font color=black>[[Axe Armor]] </font> |
||
| + | |<font color=black>Can curve its axes mid-flight so they return low if thrown high, and vice-versa. </font> |
||
| + | |- |
||
| + | |<font color=black>[[File:Wight.gif|40px]] </font> |
||
| + | |<font color=black>18. </font> |
||
| + | |<font color=black>[[Wight#Castlevania: Portrait of Ruin|Wight]] </font> |
||
| + | |<font color=black>Walks faster and inflicts [[Poison]] on contact. </font> |
||
| + | |- |
||
| + | |<font color=black>[[File:Frozenshade.gif|35px]] </font> |
||
| + | |<font color=black>19. </font> |
||
| + | |<font color=black>[[Frozen Shade]] </font> |
||
| + | |<font color=black>Wind-up for frost attack is much shorter; summons 5 icicles instead of 3, which take aim and are launched much faster. </font> |
||
| + | |- |
||
| + | |<font color=black>[[File:Invisibleman.gif|35px]] </font> |
||
| + | |<font color=black>21. </font> |
||
| + | |<font color=black>[[Invisible Man]] </font> |
||
| + | |<font color=black>Attacks far more aggressively and no longer pauses between attacks. </font> |
||
| + | |- |
||
| + | |<font color=black>[[File:Porgolem.gif|80px]] </font> |
||
| + | |<font color=black>22. </font> |
||
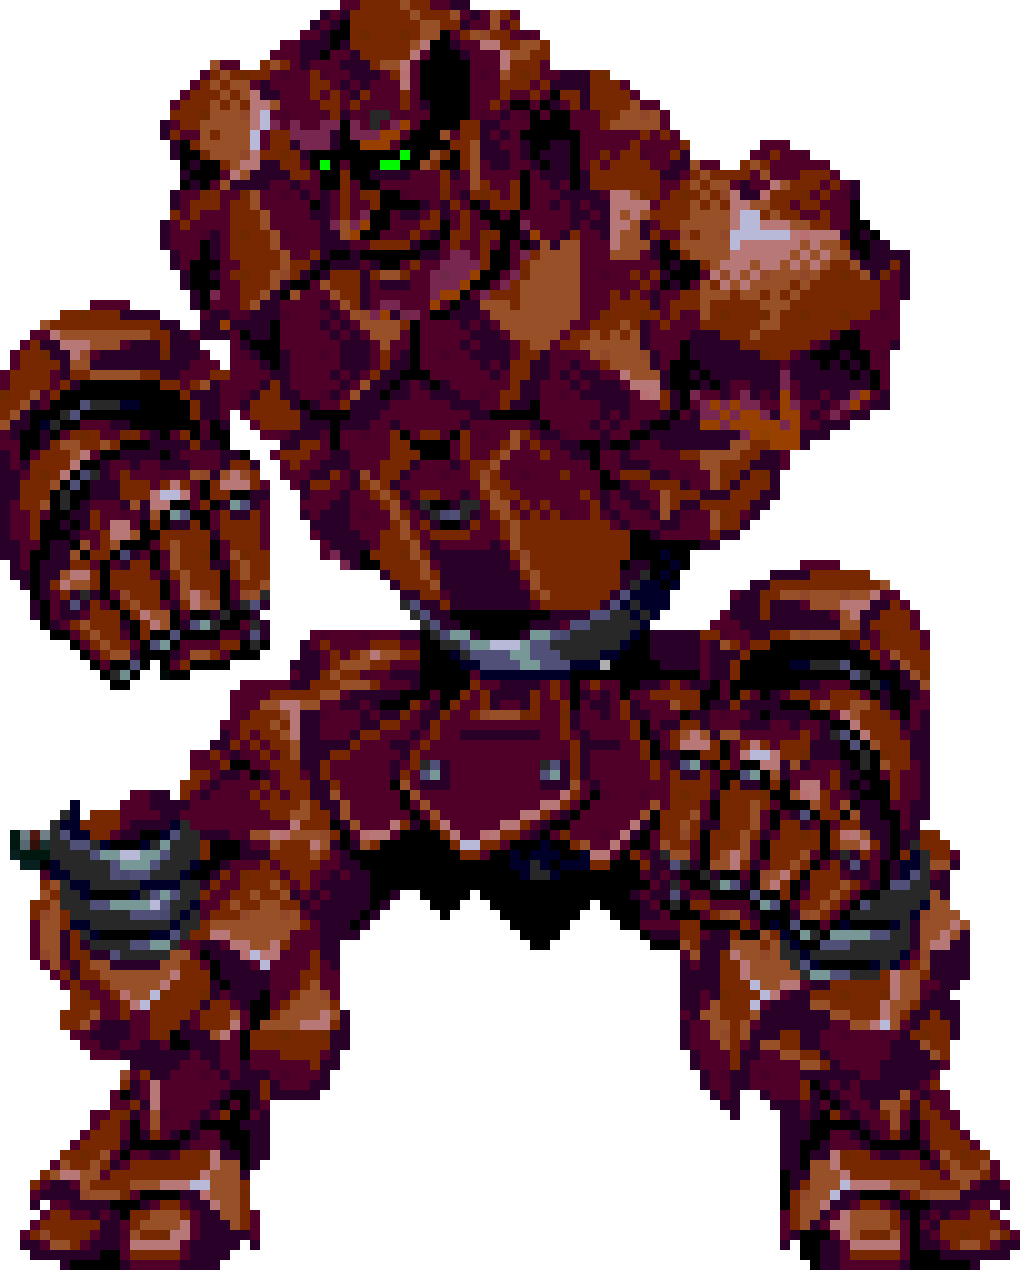
| + | |<font color=black>[[Golem#Castlevania: Portrait of Ruin|Golem]] </font> |
||
| + | |<font color=black>Walks faster. </font> |
||
| + | |- |
||
| + | |<font color=black>[[File:Spittlebone.gif|30px]] </font> |
||
| + | |<font color=black>27. </font> |
||
| + | |<font color=black>[[Spittle Bone]] </font> |
||
| + | |<font color=black>Sprays fire over a much greater area. </font> |
||
| + | |- |
||
| + | |<font color=black>[[File:Ghost-1-.gif|35px]] </font> |
||
| + | |<font color=black>28. </font> |
||
| + | |<font color=black>[[Ghost]] </font> |
||
| + | |<font color=black>Spawns more frequently and moves much faster. </font> |
||
| + | |- |
||
| + | |<font color=black>[[File:POR-Ectoplasm.gif|45px]] </font> |
||
| + | |<font color=black>31. </font> |
||
| + | |<font color=black>[[Ectoplasm]] </font> |
||
| + | |<font color=black>Moves faster. </font> |
||
| + | |- |
||
| + | |<font color=black>[[File:Slimepor.gif|55px]] </font> |
||
| + | |<font color=black>36. </font> |
||
| + | |<font color=black>[[Slime#Castlevania: Portrait of Ruin|Slime]] </font> |
||
| + | |<font color=black>Moves faster and inflicts [[Poison]] on contact. </font> |
||
| + | |- |
||
| + | |<font color=black>[[File:Flyingskull.gif|35px]] </font> |
||
| + | |<font color=black>42. </font> |
||
| + | |<font color=black>[[Ghost|Flying Skull]] </font> |
||
| + | |<font color=black>Moves faster. </font> |
||
| + | |- |
||
| + | |<font color=black>[[File:Sotnskull.gif|70px]] </font> |
||
| + | |<font color=black>47. </font> |
||
| + | |<font color=black>[[Giant Ghost#Castlevania: Portrait of Ruin|Great Ghost]] </font> |
||
| + | |<font color=black>Dashes further and faster. </font> |
||
| + | |- |
||
| + | |<font color=black>[[File:Hillguard.gif|50px]] </font> |
||
| + | |<font color=black>53. </font> |
||
| + | |<font color=black>[[Hill Guard]] </font> |
||
| + | |<font color=black>Moves much faster. </font> |
||
| + | |- |
||
| + | |<font color=black>[[File:Corpseweed-1-.gif|35px]] </font> |
||
| + | |<font color=black>56. </font> |
||
| + | |<font color=black>[[Corpseweed]] </font> |
||
| + | |<font color=black>Spawns fully grown; shoots three blobs aimed directly at the player as soon as they approach, and then in regular intervals. </font> |
||
| + | |- |
||
| + | |<font color=black>[[File:Medhead2.gif|40px]] </font> |
||
| + | |<font color=black>57. </font> |
||
| + | |<font color=black>[[Medusa Head]] </font> |
||
| + | |<font color=black>Are always gold, and thus always inflict [[Stone]] on contact. </font> |
||
| + | |- |
||
| + | |<font color=black>[[File:Slogra.gif|75px]] </font> |
||
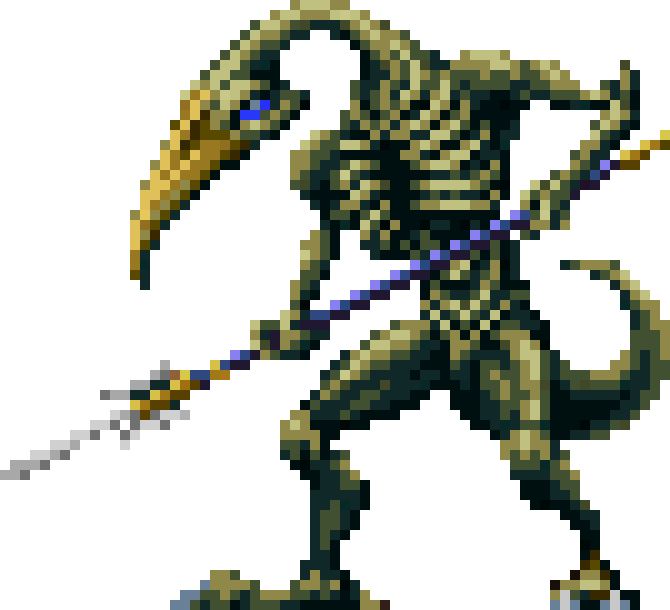
| + | |<font color=black>60. </font> |
||
| + | |<font color=black>[[Slogra#Castlevania: Portrait of Ruin|Slogra]] </font> |
||
| + | |<font color=black>Moves faster. </font> |
||
| + | |- |
||
| + | |<font color=black>[[File:Moldycorpse.gif|40px]] </font> |
||
| + | |<font color=black>68. </font> |
||
| + | |<font color=black>[[Moldy Corpse]] </font> |
||
| + | |<font color=black>Sprays clouds further, and in all directions. </font> |
||
| + | |- |
||
| + | |<font color=black>[[File:Redaxarmr.gif|60px]] </font> |
||
| + | |<font color=black>71. </font> |
||
| + | |<font color=black>[[Red Axe Armor#Castlevania: Portrait of Ruin|Red Axe Armor]] </font> |
||
| + | |<font color=black>Can curve its axes mid-flight so they return low if thrown high, and vice-versa. </font> |
||
| + | |- |
||
| + | |<font color=black>[[File:Maneatingplant.gif|75px]] </font> |
||
| + | |<font color=black>72. </font> |
||
| + | |<font color=black>[[Maneating Plant]] </font> |
||
| + | |<font color=black>Spits two skulls at once instead of one; releases more spores after it flowers. </font> |
||
| + | |- |
||
| + | |<font color=black>[[File:Wyvern.gif|100px]] </font> |
||
| + | |<font color=black>75. </font> |
||
| + | |<font color=black>[[Wyvern#Castlevania: Portrait of Ruin|Wyvern]] </font> |
||
| + | |<font color=black>Shoots three flaming dragon heads in a row instead of one. </font> |
||
| + | |- |
||
| + | |<font color=black>[[File:POR-Ghoul.gif|60px]] </font> |
||
| + | |<font color=black>85. </font> |
||
| + | |<font color=black>[[Ghoul#Castlevania: Portrait of Ruin|Ghoul]] </font> |
||
| + | |<font color=black>Walks faster and inflicts [[Poison]] on contact. </font> |
||
| + | |- |
||
| + | |<font color=black>[[File:Flearmor-1-.gif|50px]] </font> |
||
| + | |<font color=black>90. </font> |
||
| + | |<font color=black>[[Armored Fleaman]] </font> |
||
| + | |<font color=black>Moves faster and attacks more aggressively. </font> |
||
| + | |- |
||
| + | |<font color=black>[[File:Tanjelly.gif|55px]] </font> |
||
| + | |<font color=black>95. </font> |
||
| + | |<font color=black>[[Tanjelly]] </font> |
||
| + | |<font color=black>Moves faster and inflicts both [[Poison]] and [[Curse]] on contact. </font> |
||
| + | |- |
||
| + | |<font color=black>[[File:Vicebeetle.gif|25px]] </font> |
||
| + | |<font color=black>100. </font> |
||
| + | |<font color=black>[[Vice Beetle]] </font> |
||
| + | |<font color=black>Sprays fire over a much greater area. </font> |
||
| + | |- |
||
| + | |<font color=black>[[File:Lightkeeper.gif|50px]] </font> |
||
| + | |<font color=black>102. </font> |
||
| + | |<font color=black>[[Biphron|Lightkeeper]] </font> |
||
| + | |<font color=black>Moves faster. </font> |
||
| + | |- |
||
| + | |<font color=black>[[File:Porminotaur.gif|100px]] </font> |
||
| + | |<font color=black>108. </font> |
||
| + | |<font color=black>[[Minotaur]] </font> |
||
| + | |<font color=black>Moves faster. </font> |
||
| + | |- |
||
| + | |<font color=black>[[File:Ghoulking.gif|60px]] </font> |
||
| + | |<font color=black>119. </font> |
||
| + | |<font color=black>[[Ghoul King]] </font> |
||
| + | |<font color=black>Walks faster and inflicts [[Poison]] on contact. </font> |
||
| + | |- |
||
| + | |<font color=black>[[File:Vapula.gif|90px]] </font> |
||
| + | |<font color=black>120. </font> |
||
| + | |<font color=black>[[Vapula]] </font> |
||
| + | |<font color=black>Magic breath moves faster and has double the range. </font> |
||
| + | |- |
||
| + | |<font color=black>[[File:Boneark.gif|80px]] </font> |
||
| + | |<font color=black>124. </font> |
||
| + | |<font color=black>[[Bone Ark]] </font> |
||
| + | |<font color=black>Fires two blasts instead of one. </font> |
||
| + | |- |
||
| + | |<font color=black>[[File:Skelefarmer.gif|35px]] </font> |
||
| + | |<font color=black>125. </font> |
||
| + | |<font color=black>[[Skeleton Farmer]] </font> |
||
| + | |<font color=black>Moves faster. </font> |
||
| + | |- |
||
| + | |<font color=black>[[File:POR-Dullahan.gif|110px]] </font> |
||
| + | |<font color=black>139. </font> |
||
| + | |<font color=black>[[Dullahan#Castlevania: Portrait of Ruin|Dullahan]] </font> |
||
| + | |<font color=black>Wind-up for jump attack is much shorter; homing blasts are launched faster and the fifth blast is replaced by four blasts that all do less damage. </font> |
||
| + | |- |
||
| + | |<font color=black>[[File:Keremet.gif|60px]] </font> |
||
| + | |<font color=black>141. </font> |
||
| + | |<font color=black>[[Keremet]] </font> |
||
| + | |<font color=black>Spawns slimes more often. </font> |
||
| + | |- |
||
| + | |<font color=black>[[File:Death10.gif|70px]] </font> |
||
| + | |<font color=black>145. </font> |
||
| + | |<font color=black>[[Death/Enemy Data#Castlevania: Portrait of Ruin|Death]] </font> |
||
| + | |<font color=black>Spawns scythes more frequently. </font> |
||
| + | |- |
||
| + | |<font color=black>[[File:Werewolf.gif|90px]] </font> |
||
| + | |<font color=black>150. </font> |
||
| + | |<font color=black>[[Werewolf#Castlevania: Portrait of Ruin|Werewolf]] </font> |
||
| + | |<font color=black>Calls forth 5 wolves instead of 3. </font> |
||
| + | |- |
||
| + | |<font color=black>[[File:Mummyman.gif|45px]] </font> |
||
| + | |<font color=black>152. </font> |
||
| + | |<font color=black>[[Mummy#Castlevania: Portrait of Ruin|Mummy Man]] </font> |
||
| + | |<font color=black>Blocks that are summoned offscreen will still be launched at the player. </font> |
||
| + | |- |
||
| + | |<font color=black>[[File:Richter-whipmem.gif|30px]] </font> |
||
| + | |<font color=black>153. </font> |
||
| + | |<font color=black>[[Richter Belmont#Castlevania: Portrait of Ruin|Whip's Memory]] </font> |
||
| + | |<font color=black>Uses subweapons more often. </font> |
||
| + | |} |
||
| + | |||
| + | ---- |
||
| + | </div> |
||
| + | </div> |
||
===''[[Castlevania: Order of Ecclesia]]''=== |
===''[[Castlevania: Order of Ecclesia]]''=== |
||
| − | Hard Mode returns in ''Order of Ecclesia'', much in the same way as it did in ''Portrait of Ruin''. After beating the game and receiving the good ending, the player can |
+ | Hard Mode returns in ''Order of Ecclesia'', much in the same way as it did in ''Portrait of Ruin''. After beating the game and receiving the good ending, the player can select to choose Hard Mode upon starting a new game. Upon doing so, the player is prompted with a choice of level caps. Beating the game on these level caps for the first time will reward the save file used as follows: |
*Hard, level cap 255: Unlocked only after beating Hard level cap 1. While it allows full leveling, it otherwise functions like the level cap 50 variant. |
*Hard, level cap 255: Unlocked only after beating Hard level cap 1. While it allows full leveling, it otherwise functions like the level cap 50 variant. |
||
*Hard, level cap 50 or lower: Awards the [[Queen of Hearts]] upon beating Hard Mode for the save file used. |
*Hard, level cap 50 or lower: Awards the [[Queen of Hearts]] upon beating Hard Mode for the save file used. |
||
| − | *Hard, level cap 1: Once the player beats Hard Mode with this level cap, |
+ | *Hard, level cap 1: Once the player beats Hard Mode with this level cap, they unlock the ability to level up to 255, as well as another level cap of choice upon selecting Hard Mode. |
| + | |||
The reward for beating Hard Mode on the level cap of 1 is a one time reward only, but the rest of the level caps do offer their reward if it is the first time for the save file used. |
The reward for beating Hard Mode on the level cap of 1 is a one time reward only, but the rest of the level caps do offer their reward if it is the first time for the save file used. |
||
| − | The following are differences from Normal Mode: |
+ | The following are differences from [[Normal Mode|Normal]] mode: |
*All damage dealt by the player is reduced by 10%, compared to Normal. |
*All damage dealt by the player is reduced by 10%, compared to Normal. |
||
*All damage dealt by enemies has a bonus that is different depending on the level cap chosen: |
*All damage dealt by enemies has a bonus that is different depending on the level cap chosen: |
||
| − | **Hard level cap 255/50: Enemy ATK +30. |
+ | **Hard level cap 255/50: Enemy [[Attack|ATK]] +30. |
| − | **Hard level cap 1: Enemy ATK +60. |
+ | **Hard level cap 1: Enemy [[Attack|ATK]] +60. |
| − | **This bonus is not affected by a character's DEF and MND stats. |
+ | **This bonus is not affected by a character's [[Defense|DEF]] and [[Mind|MND]] stats. |
*In addition, if more than 1 point of damage comes from the enemy's base ATK, that base ATK value gains a +50% bonus. |
*In addition, if more than 1 point of damage comes from the enemy's base ATK, that base ATK value gains a +50% bonus. |
||
| − | *Some enemies receive additional bonuses and/or traits that make combat against them more difficult. Others may simply appear earlier in the game compared to Normal Mode. To name an example: Medusa heads can be seen as early as in [[Ruvas Forest]] |
+ | *Some enemies receive additional bonuses and/or traits that make combat against them more difficult. Others may simply appear earlier in the game compared to Normal Mode. To name an example: Medusa heads can be seen as early as in [[Ruvas Forest]] and will always be gold colored, signifying that Stone will be inflicted upon taking a hit. |
===''[[Castlevania: Harmony of Despair]]''=== |
===''[[Castlevania: Harmony of Despair]]''=== |
||
| − | Hard Mode unlocks in ''Harmony of Despair'' after finishing [[Come, Sweet Hour of Death|Chapter 6]]. Subsequent chapters (DLCs in Xbox 360) have their Hard Mode already unlocked. Enemies have a higher degree of vitality and the player characters suffer more damage per hit. In addition, certain enemies receive different attacks compared to Normal Mode. |
+ | Hard Mode unlocks in ''Harmony of Despair'' after finishing [[Come, Sweet Hour of Death|Chapter 6]]. Subsequent chapters (DLCs in Xbox 360) have their Hard Mode already unlocked. Enemies have a higher degree of vitality and the player characters suffer more damage per hit. In addition, certain enemies receive different attacks compared to Normal Mode. For example: [[Dracula]]'s final form sports fire pillars briefly before using [[Demonic Megiddo#Castlevania: Harmony of Despair|Demonic Megiddo]], and one of his normal attacks will have lightning cutting through the room, nullifying the possibility of jumping. |
| + | |||
| + | ==Gallery== |
||
| + | <gallery position="center" captionalign="center" caption="Hard Mode"> |
||
| + | Joachim mode unlocked.png|'''Crazy''' and [[Joachim Mode|Joachim]] modes unlocked in ''[[Castlevania: Lament of Innocence|Lament of Innocence]]'' |
||
| + | Lament of Innocence - Name Entry Screen - 02.png|[[Name Entry Screen|Name Entry]] screen listing some of the [[Alternate Mode|alternate modes]] available in ''[[Castlevania: Lament of Innocence|Lament of Innocence]]'', one of them being '''Crazy''' mode |
||
| + | Curse of Darkness - Name Entry Screen - 01.png|[[Name Entry Screen|Name Entry]] screen listing the two [[Alternate Mode|alternate modes]] available in ''[[Castlevania: Curse of Darkness|Curse of Darkness]]'', one of them being '''Crazy Difficulty''' mode |
||
| + | </gallery> |
||
{{COD}} |
{{COD}} |
||
| − | [[Category: |
+ | [[Category:Alternate Modes]] |
[[Category:Adventure]] |
[[Category:Adventure]] |
||
[[Category:Castlevania I]] |
[[Category:Castlevania I]] |
||
Revision as of 01:55, 29 September 2019
Hard Mode, or simply Hard, is an alternate mode frequently present in games that conform the Castlevania series. This mode generally becomes available to the player after completing the game on the Normal difficulty. In it, the player can go through the game a second time with a harder difficulty setting.
Overview
Hard Mode first appeared in the very first Castlevania, and since then most games have followed this tradition. It is usually playable after the game is beaten on Normal Mode. Oftentimes, it features additional enemies in the area, enemies being replaced by more powerful enemies, enemies gaining extra characteristics, faster enemies, and reduced attack and defense abilities for the player. This mode has had different names in some games, such as "Crazy Mode".
In Castlevania Judgment, there is an even harder mode that is unlocked after the completion of Hard Mode: Brutal Mode.
Game specific information
Castlevania
In Castlevania, Hard Mode is an additional quest that takes place after the player beats Dracula in Normal Mode. As there are no saves or passwords in the original NES version of this game, it is not possible to play Hard Mode without first playing through the entire Normal Mode during that session. It features additional enemies, such as Bats or Medusa Heads in awkward places. Some of the enemies, such as Zombies, move faster. Each enemy deals twice the damage they normally do, even in early levels. Additional hidden crowns, which are worth many points, can be found in this mode. Every time the player beats Hard Mode, another round of Hard Mode can be started.
Castlevania: The Adventure
Hard Mode returns in The Adventure. Upon beating the game in Normal Mode, the player can play through the game again with damage from creatures increased twofold. This will continue to increase with each subsequent loop through the four stages.
- Stage 5 to 8: Enemy damage ×2
- Stage 9 to 12: Enemy damage ×4
- Stage 13 to 16: Enemy damage ×8
- Stage 17 to 20: Enemy damage ×16 (instant death)
Clearing Stage 20 will not increase the difficulty any further. However, the score and the stage number will still increase.
Castlevania II: Belmont's Revenge
Hard Mode exists in the Game Boy sequel. However, it is only accessible via Password (beating the main game will not allow carrying on into 'Hard Mode' like in the previous Game Boy or NES games).
Hard Mode in this game is very similar to the Normal mode, as the enemies and damage do not change from the regular gameplay. Despite this, there are a few differences that add to the challenge:
- The Vampire Killer will downgrade immediately upon contact with some enemies, making the whip system much more in-line with Castlevania: The Adventure.
- There are no Passwords for Hard Mode other than the initial Password to begin the game. Therefore, there is no way to resume progress, meaning players will have to get to the end in one sitting (although 'Continues' are still unlimited).
Castlevania III: Dracula's Curse
In Dracula's Curse, Hard Mode can be played after beating Dracula in Normal Mode. Because of the password system, this is the first game where the player can start a new session in Hard Mode, provided the game has been beaten before. The player starts Hard Mode with the character they beat Normal Mode. The player takes more damage in this mode. Additional creatures have been added and others have been swapped with more powerful ones. There are some creatures that appear in this mode that do not appear in the normal game, such as floating skulls that move similar to Medusa Heads, but with much more erratic and unpredictable up and down motions.
Starting a new game with the secret name "AKAMA" at the password screen starts a new game with Trevor only already in Hard Mode without the need of beating Normal Mode.
Castlevania: Bloodlines
Entering the Konami Code at the title screen (a sound will confirm it) enables the selection of the "Expert" difficulty in the option screen. The code also gives the player the possibility of starting the game with 9 lives if it is entered at the title screen after the music settings in the option screen have been set to BGM 05 and SE 073.
Castlevania: Harmony of Dissonance
Enter "HARDGAME" at the Name Entry screen. A sound will play if the code was entered successfully.
Castlevania: Aria of Sorrow
In this game, hard difficulty can be played once the game has been beaten once. In this mode, enemies will receive 20% less damage. Their souls will be easier to get as long as Soma has not obtained them before. The Kaiser Knuckle, Silver Gun, Tear of Blood, Death's Scythe and Death's Robe can only be obtained in this mode, scattered throughout the many areas that conform the castle.
Castlevania: Lament of Innocence
Crazy mode is one of the two first alternate modes unlocked in Lament of Innocence, along with Joachim Mode. After finishing the game as Leon Belmont, a new game with a harder difficulty setting can be started. The changes on difficulty can be summed up on this three points:
- Enemy placement changes. Sometimes, rooms will have more enemies than in Normal Mode, or feature more powerful enemies replacing them.
- All enemies will have new attacks and the pattern for their regular attacks will change.
- Some bosses will spam new and more powerful attacks, although sometimes said increase on difficulty will be the result of an environmental change.
After completing this mode, the Mobius's Brooch will become available for purchase at Rinaldo's shop.
Castlevania: Curse of Darkness
In Curse of Darkness, the player can unlock Hard Mode (called Crazy Mode), as well as Trevor Mode, which allows the player to play as Trevor Belmont. It is unlocked by starting a new game with "@CRAZY" as the save name.
In this mode, most enemies are ×10 and strong enemies are ×20 the level compared to Hector, while retaining the same experience given in Normal Mode, making the game much more challenging and making it harder to level up. The enemies A.I. is also slightly improved as they can sometimes synchronize attacks in order to break Hector's guard. Similar to Lament of Innocence, finishing the game on this difficulty allows the player to purchase the Mobius Brooch, which reduces the cost of the Innocent Devils' skills to zero.
Castlevania: Dawn of Sorrow
As usual, Hard mode becomes available after completing the game once in Normal mode. To access it, select "Game Start" from the title menu and then "Select Data" from the files menu; a bat-like icon with the word "Clear" will appear on the next screen above your old, cleared file; select it (not the actual file icon below it) and the option to start a new game will be given to start a new game+ either on Normal or Hard difficulty.
Hard mode has the following gameplay changes:
- All Medusa Heads become Gold Medusas.
- Stats no longer level up continuously. The player needs to level up a few times in order to gain stat boosts.
- Traps (spikes, blades, etc.) deal about double damage.
- Some enemies are leveled-up and have more HP.
Upon completing Hard Mode, Hellfire is added to the player's Bullet Souls.
Castlevania: Portrait of Ruin
Hard Mode returns in Portrait of Ruin as an unlockable feature after beating the main game and receiving the good ending. Upon selection, the player is prompted with a choice of three level caps. Completing each difficulty level cap will reward the save file used with one of three items, depending on the level cap selected:
- Level 50 or lower: Vic Viper (LCK +50).
- Level 25 or lower: Twin Bee (INT +50).
- Level 1: Konami Man (STR +50).
Each of the rewards above may be obtained only once, but if the player feels up to the challenge, they can freely skip an easier level cap in favor of a more difficult one with little fear of missing that cap's reward.
The following are differences from Normal Mode:
- All damage dealt by the player is reduced by 25% compared to Normal.
- All enemies have a bonus to their attack power that scales with the player's level. This starts at different points, depending on the cap chosen, but as a player levels up, enemies deal more and more damage. This caps out at 100+ per hit when the player reaches the cap chosen and is not affected by a character's DEF or MND.
- Some enemies and bosses receive additional traits and/or bonuses compared to Normal Mode. All known changes are listed below:


Castlevania: Order of Ecclesia
Hard Mode returns in Order of Ecclesia, much in the same way as it did in Portrait of Ruin. After beating the game and receiving the good ending, the player can select to choose Hard Mode upon starting a new game. Upon doing so, the player is prompted with a choice of level caps. Beating the game on these level caps for the first time will reward the save file used as follows:
- Hard, level cap 255: Unlocked only after beating Hard level cap 1. While it allows full leveling, it otherwise functions like the level cap 50 variant.
- Hard, level cap 50 or lower: Awards the Queen of Hearts upon beating Hard Mode for the save file used.
- Hard, level cap 1: Once the player beats Hard Mode with this level cap, they unlock the ability to level up to 255, as well as another level cap of choice upon selecting Hard Mode.
The reward for beating Hard Mode on the level cap of 1 is a one time reward only, but the rest of the level caps do offer their reward if it is the first time for the save file used.
The following are differences from Normal mode:
- All damage dealt by the player is reduced by 10%, compared to Normal.
- All damage dealt by enemies has a bonus that is different depending on the level cap chosen:
- In addition, if more than 1 point of damage comes from the enemy's base ATK, that base ATK value gains a +50% bonus.
- Some enemies receive additional bonuses and/or traits that make combat against them more difficult. Others may simply appear earlier in the game compared to Normal Mode. To name an example: Medusa heads can be seen as early as in Ruvas Forest and will always be gold colored, signifying that Stone will be inflicted upon taking a hit.
Castlevania: Harmony of Despair
Hard Mode unlocks in Harmony of Despair after finishing Chapter 6. Subsequent chapters (DLCs in Xbox 360) have their Hard Mode already unlocked. Enemies have a higher degree of vitality and the player characters suffer more damage per hit. In addition, certain enemies receive different attacks compared to Normal Mode. For example: Dracula's final form sports fire pillars briefly before using Demonic Megiddo, and one of his normal attacks will have lightning cutting through the room, nullifying the possibility of jumping.
Gallery
")
")
")